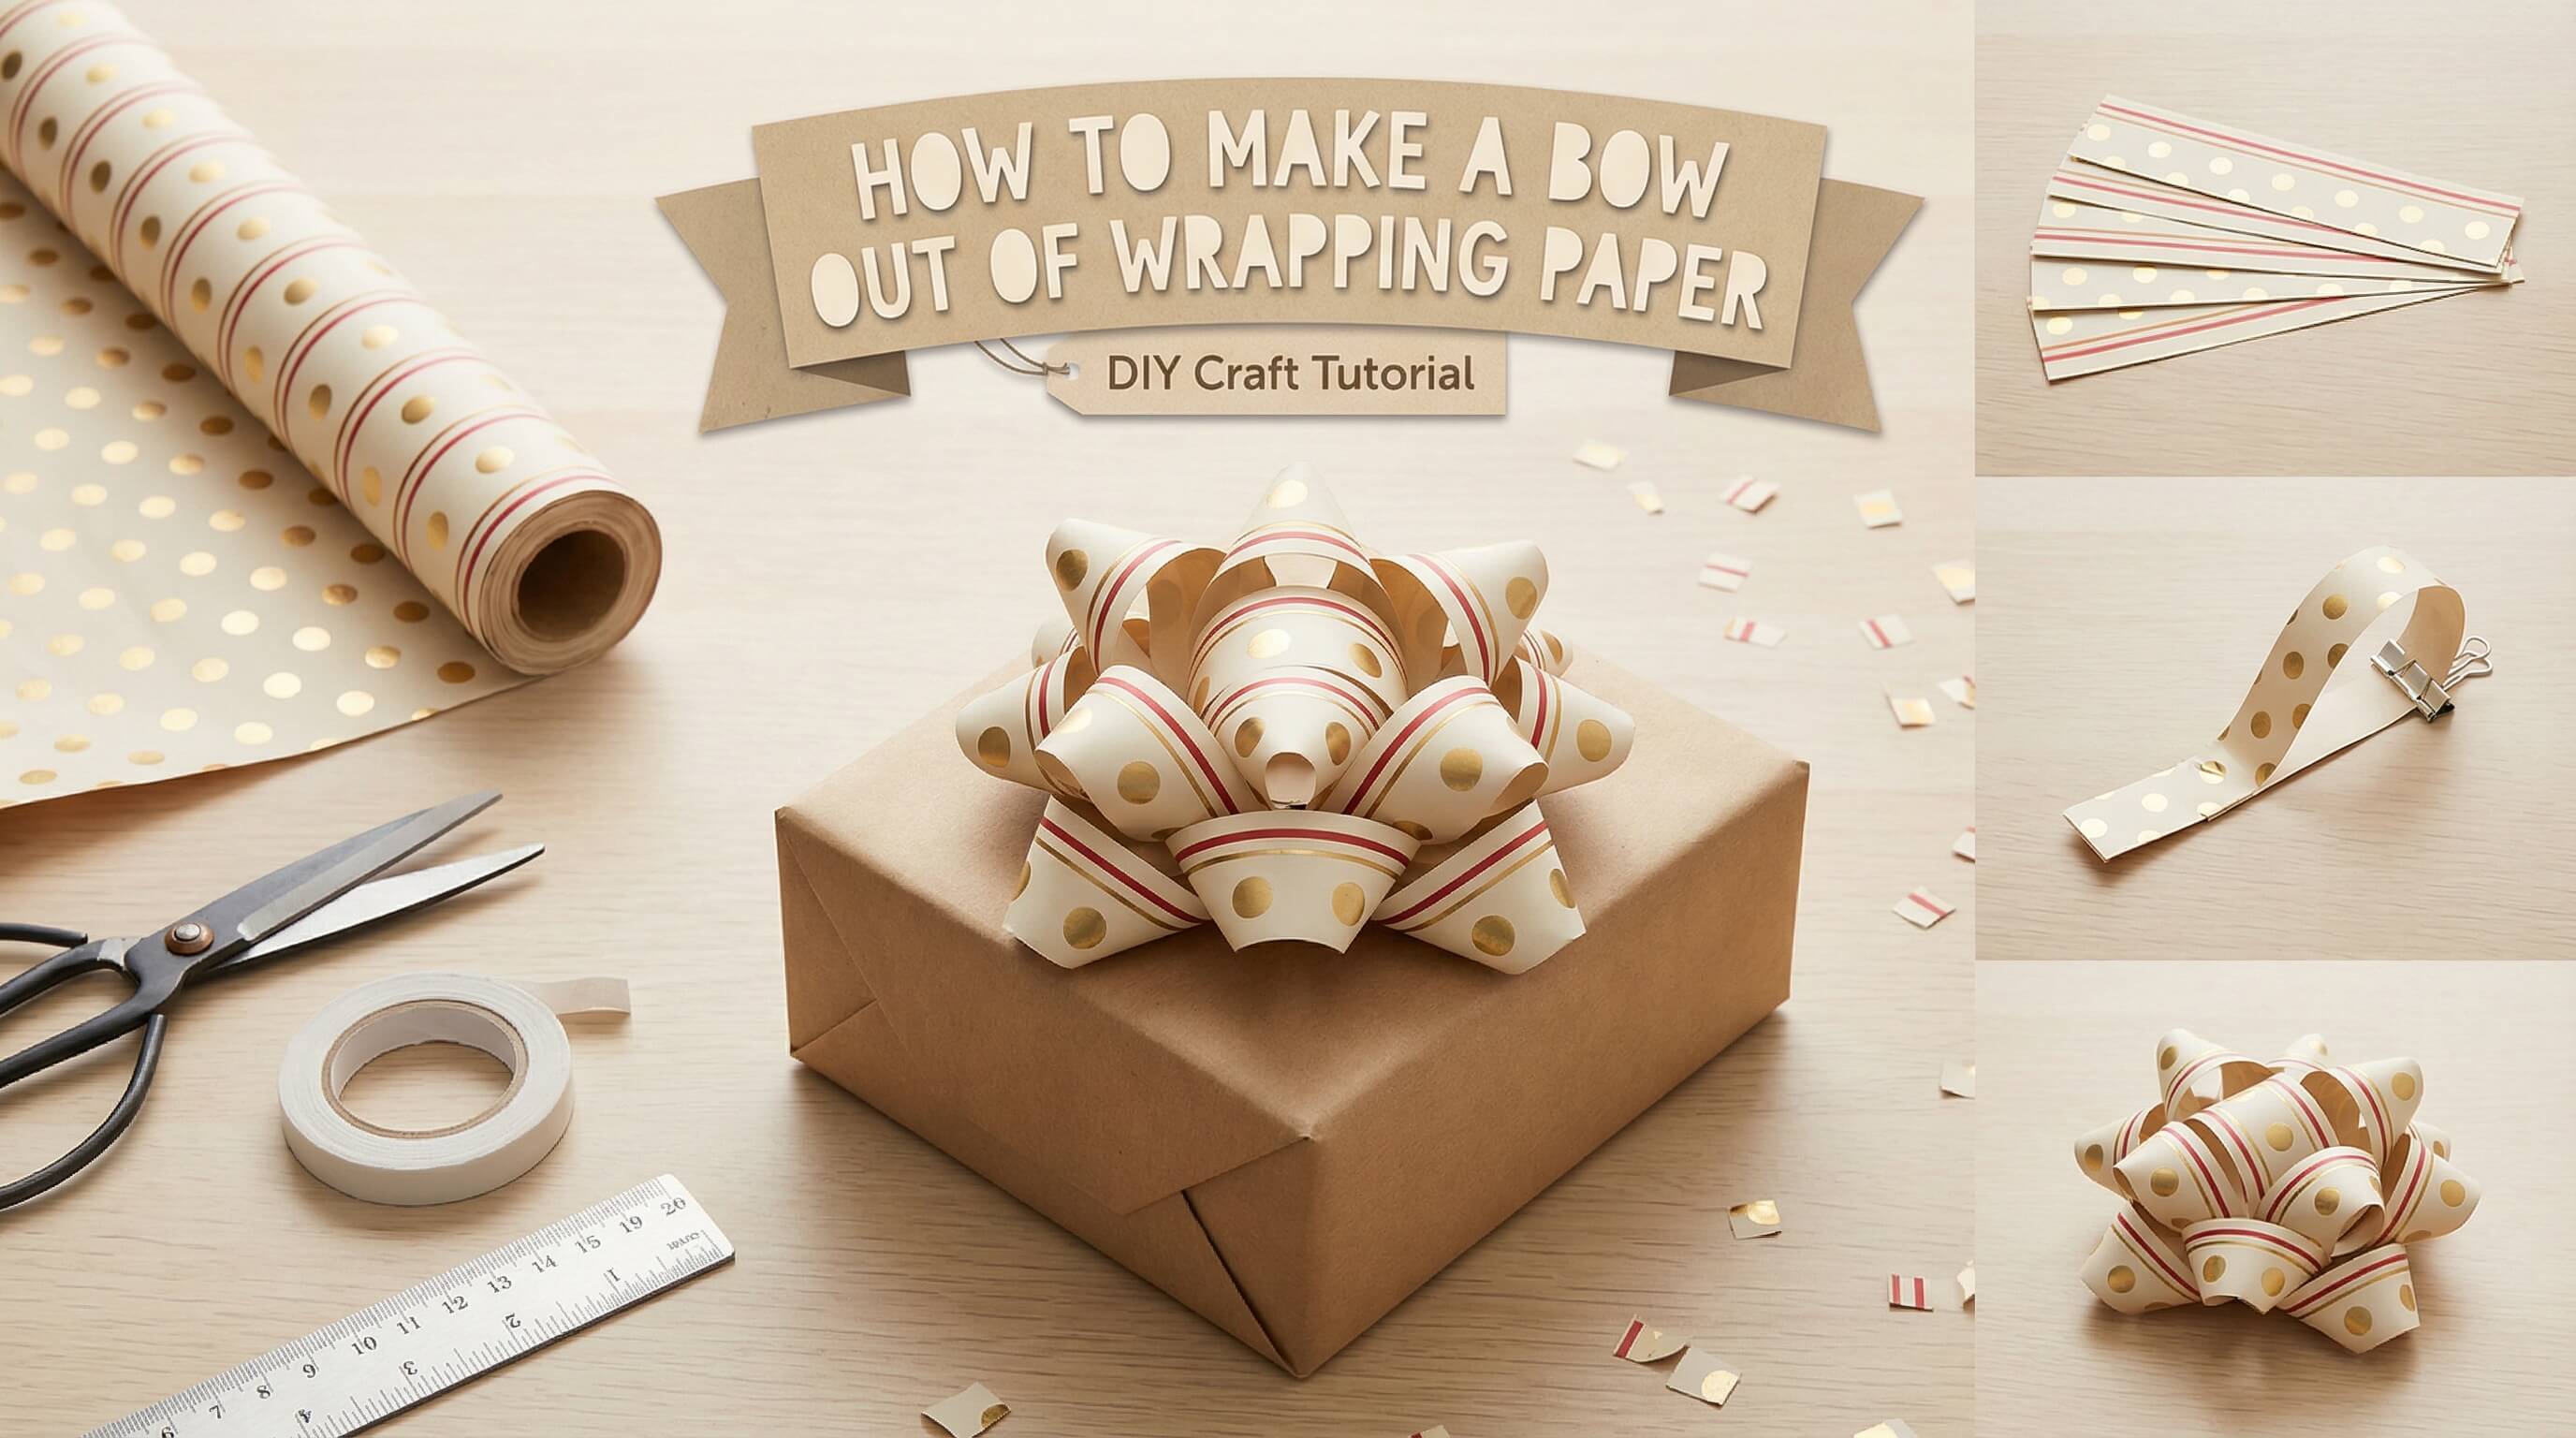
Transform leftover wrapping paper into beautiful bows that can compete with expensive store-bought ribbon. This guide shows you various ways to create paper bows, from simple gift toppers to large showstoppers that make any present memorable. Whether you’re using Christmas wrapping paper, cute wrapping paper patterns, or scraps from your craft supplies, you’ll learn to make bows that look professional while saving money and cutting down on waste.
Why Paper Bows Beat Traditional Ribbon Every Time
Paper bows have benefits that ribbon can’t match. They’re a great way to recycle materials you already have. Matching your bow with your wrap gives a polished, designer look that expensive ribbon often lacks. A bow made from wrapping paper costs just a few cents compared to pre-made options. You can control the exact size you want, from small accents for paper gift bags to large decorations for cardboard box gifts.
The environmental angle matters too. Wrapping paper bows use materials that would otherwise end up in the trash. That scrap piece after wrapping your gift box? It becomes the perfect bow. Those beautiful paper patterns hiding in your closet? They deserve a second life as decor.
Essential Materials You Already Have
Creating paper bows requires almost nothing you don’t already own. Grab wrapFping paper (any weight works, though medium-weight performs best), scissors, and tape. Optional additions include glue, a staple, or wire for securing centers. Scrapbook paper provides gorgeous alternatives when you want something extra special.
The beauty of this craft lies in its flexibility. Christmas wrapping paper creates festive holiday season decorations. Metallic patterns add shimmer. Even brown kraft paper gift bags can be cut into rustic, charming bows. Hunt through your supplies—you likely have everything needed.
The Classic Loop-and-Pinch Paper Bow
This fundamental technique produces elegant bows in minutes. Start by cutting your wrapping paper into strips. For a medium bow, cut six strips measuring one inch wide and eight inches long. Length determines your bow’s fullness, while width affects its delicacy.
Take your first strip and create a loop, bringing the ends together at the center of the bow. Pinch firmly where they meet. The loop should resemble a fish eye when viewed from the side. Repeat with remaining strips, stacking each new loop perpendicular to the last. This creates dimensional fullness.
Once all loops are stacked, secure the center with tape, glue, or a quick staple. Fluff and adjust each loop until your bow looks balanced. This method works beautifully atop gift wrap, attached to handles on bags, or as standalone home decor accents.
How To Make A Big Bow Out Of Wrapping Paper
Oversized bows make statements. They transform simple cardboard box packaging into showstopping gifts. The secret? Scale up your strip measurements dramatically.
Cut eight to ten strips of paper, each three inches wide and eighteen inches long. Follow the loop and pinch method, but work larger. Stack your loops generously, creating substantial volume. The center will be thick, so use strong tape or wire to secure everything tightly.
For extra drama, cut additional longer strips and let them dangle beneath the bow’s center like ribbon tails. These flowing elements add movement and elegance. Super easy to execute, this technique guarantees your gift gets noticed first under the tree.
Big paper bows work especially well on large items. Wrap a bicycle, furniture piece, or collection of boxes, then crown it with a massive bow. The contrast between simple wrap and an oversized topper creates visual impact that photos can’t capture.
The Accordion-Fold Bow Tutorial
This diy bow method produces fuller, rounder results. Cut one long strip of wrapping paper—approximately three inches wide and three feet long. Fold the strip accordion-style, making each fold about two inches wide. Work carefully to keep folds even.
Once your entire strip is folded, pinch it tightly at the center. Secure with tape or wire. Now comes the fun part: gently pull each layer outward and upward, separating the folds. Work slowly to avoid tearing. As you separate layers, the bow expands into a full, fluffy sphere.
This video tutorial favorite creates bows that look complex but remain easy to make. The technique works with any paper weight, though thinner wrapping paper produces the most delicate, tissue-like results. Thicker scrapbook paper yields sturdy, structured bows perfect for hanging as holiday decorations.
The Spiral Strip Bow From Wrapping Paper
Here’s a unique approach that uses continuous cutting. Take a piece of wrapping paper and cut a spiral from the outside edge toward the center, creating one long, continuous strip. Keep your cut width consistent—about one inch works well.
Starting from the outside end of your spiral, begin rolling the strip loosely around itself. As you roll, the paper naturally forms petal-like layers. When you reach the center, secure the base with tape. The result resembles a paper rose—gorgeous atop any gift.
This method works spectacularly with patterned wrapping paper. Each spiral layer reveals the design, creating depth and visual interest. Try it with metallic papers for shimmer or cute wrapping paper prints for whimsy.
Quick Bow Variations For Different Packaging
Not all gifts need the same bow style. Small gift bags deserve petite, delicate bows made from narrow strips. Larger boxes can handle bold, multi-loop creations. Learn how to make paper bows in several sizes, and you’ll always have the perfect topper.
For gift box tops, create flat bows by making loops but laying them horizontally rather than vertically stacking them. This prevents the bow from adding too much height. For wrapping paper bag handles, thread thin strips through the holes before forming loops, ensuring the bow stays attached.
Adapt your technique to your wrap. Busy patterns work best with simpler bow styles that don’t compete visually. Solid colors let you create elaborate, multi-layered designs that become the focal point.
Common Mistakes And How To Avoid Them
The most frequent error? Cutting strips that don’t match. Inconsistent widths create lopsided bows. Measure carefully or use a ruler as a cutting guide. Sharp scissors matter too—dull blades tear paper rather than cutting cleanly.
Another pitfall involves center securing. Too little tape means your bow falls apart. Too much creates visible bulk. Find the balance by using small pieces of strong tape placed strategically. If your bow won’t hold its shape, the paper may be too thin. Double it up or switch to a heavier weight.
Don’t fear experimentation. Paper is cheap. Practice makes perfect. Those first few attempts might not win awards, but each teaches you what works for the materials you’re using.
Creative Ways To Use Paper Bows Beyond Gifts
These bows aren’t just for presents. String several together for garland. Attach them to wreaths. Use them as napkin rings at holiday dinners. Stick them onto picture frames or mirror corners for festive decor touches.
Create a stunning centerpiece by making bows in varying sizes and arranging them in a bowl or vase. Mix patterns and colors for visual interest. During the holiday season, paper bows can replace expensive decorations throughout your home.
Teachers and party planners love paper bows. They’re inexpensive enough for classroom crafts or large events. Kids can make bows out of wrapping paper as activities, then take them home as keepsakes.
Storing And Preserving Your Paper Bow Creations
Paper bows crush easily, but simple storage prevents damage. Place finished bows in shallow boxes, separating layers with tissue paper. Store in cool, dry locations to prevent moisture damage. Avoid stacking heavy items on top.
For bows you want to reuse year after year, consider spraying them lightly with acrylic sealer. This adds stiffness and protects against humidity. It also makes the bow easier to secure to packages without tape showing.
Some crafters create entire bow collections, organizing by color, pattern, and size. Label storage containers clearly. When gift-giving occasions arrive, you’ll have options ready without last-minute scrambling.
WikiHow-Style Step-By-Step For Beginners
Want your bow to succeed on the first try? Follow this foolproof sequence. First, gather materials: wrapping paper, scissors, and tape. Second, decide your desired bow size—small (four-inch strips), medium (eight-inch strips), or large (twelve to eighteen-inch strips). Third, cut six to eight strips of equal length and width.
Fourth, create your first loop by bringing strip ends together. Fifth, pinch firmly at the meeting point. Sixth, repeat with remaining strips, rotating each new loop ninety degrees from the previous one. Seventh, secure all loops at the center with tape. Eighth, fluff and adjust loops until satisfied.
This basic diy approach works every time. Once comfortable, modify the technique. Try different strip counts, vary loop sizes within one bow, or add dangling tails. The fundamentals remain constant.
Key Takeaways For Perfect Paper Bows
- Use medium-weight wrapping paper for best results—too thin tears easily, too thick won’t loop gracefully
- Cut uniform strips for balanced, professional-looking bows
- Stack loops perpendicular to each other for maximum fullness and dimension
- Secure centers firmly with tape, wire, or staples to prevent unraveling
- Scale strip length and width to create bows matching your gift size
- Leftover wrapping paper transforms into beautiful, coordinated gift toppers
- Practice with scrap materials before using your favorite patterns
- Accordion-fold methods create the fullest, roundest bows
- Paper bows work for home decor, party decorations, and special events beyond just gift wrap
- Store finished bows carefully in shallow boxes to maintain their shape between uses
Excellent breakdown of unboxing trends. How do you see smart packaging evolving this year.