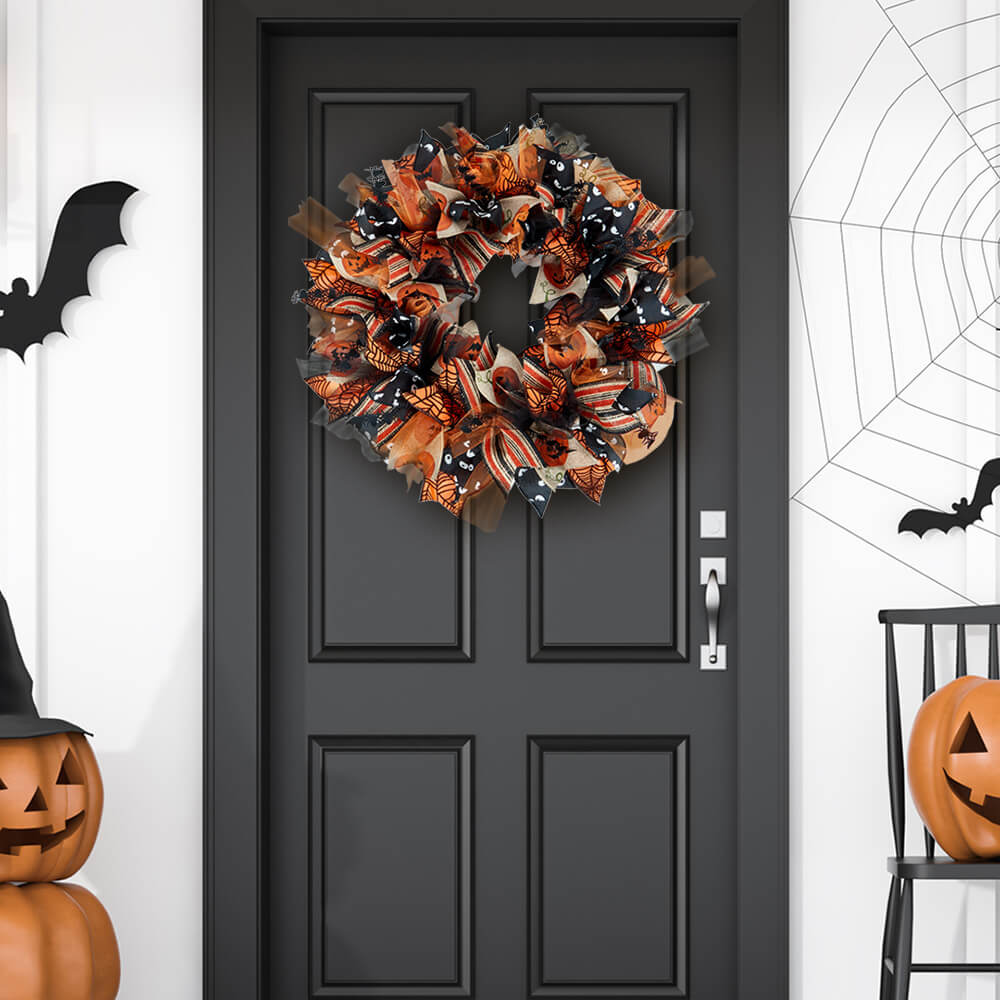
Embrace the spirit of Halloween with a touch of DIY creativity! In this step-by-step guide, we’ll walk you through crafting a bewitching Halloween wreath that’s sure to cast a spell on any visitor. With just a few supplies and a dash of imagination, you’ll transform a basic foam wreath into a true masterpiece.
So, gather your materials, and let’s embark on this crafting adventure to conjure up a wreath that’s equal parts eerie and elegant. Get ready to impress your guests and haunt your halls with a wreath that captures the essence of All Hallow’s Eve!

What You’ll Need To Make a Halloween Wreath
- Foam wreath (We used a floral foam wreath!)
- Scissors
- Ruler
- U Shaped Push Pins
- Halloween Themed Ribbon
- Tulle

How to Make a Scary Good DIY Halloween Wreath
Step 1: Prepare Your Materials
Begin by gathering all the materials you’ll need for this DIY project. Lay them out in your workspace to ensure easy access as you work through the steps.
Step 2: Cut the Ribbons
Using your ruler and scissors, cut 10 pieces of each ribbon at a length of 9”. For the tulle, also cut 10 pieces of each color, but at a slightly longer length of 10”. Focus on achieving clean, precise cuts to ensure a polished finish.
Step 3: Add Fishtail Ends
For the 2 ½” wide ribbons, create fishtail ends by carefully snipping the ends. This simple touch adds an extra layer of detail to your wreath, giving it a professional and charming appearance.
Step 4: Pinning Process
Begin the assembly by pinning the 2 ½” wide ribbon pieces into the foam wreath. Fold each piece in half, scrunch up the center, then position the U shaped push pin around the scrunched center. Firmly pin it into the foam wreath.
Optional: Conceal with Burlap Ribbon
If you want to mask the green foam wreath, consider wrapping it with burlap ribbon. This step is entirely optional but it can provide a more cohesive and polished look to your wreath.
Step 5: Incorporate Your Tulle
Next, integrate the tulle pieces into the wreath. Employ the same folding and scrunching technique used for the ribbons. Add tulle wherever there is an empty spot between the ribbon pieces.
Step 6: Finishing Touches
For an extra dash of Halloween flair, incorporate a unique ribbon like our Laser Cut Black Spider Ribbon. This can add an extra playful element into your wreath’s design.
Step 7: Fluff and Finalize
Give your wreath a final fluffing to ensure all elements are positioned to your satisfaction. This will allow you to adjust your ribbons or tulle for a balanced and polished appearance.
Congratulations, you’ve now crafted a bewitching Halloween wreath! This DIY project combines creativity with some Halloween magic, resulting in a unique and eye-catching decoration for your home. Display it proudly and let it add a spook-tacular touch to your festive décor.
Paper Mart Fosters Your Creativity
Ever spent hours hunting for the ideal decor piece, only to return empty-handed? No worries! With our DIY Halloween Wreath tutorial, you can craft a bewitching wreath that will captivate your guests.
These wreaths not only offer an affordable alternative, but they’re also entirely customizable to suit your unique style and color preferences. Let your creativity run wild!
Want to try your hand at other Halloween-themed crafts? Check out Our Top 6 Halloween DIYs!
Love the Halloween wreath. I have purchased the supplies from you but I wonder what size foam wreath was used.
Thank you.
We’re so glad you love the Halloween wreath! 🎃 Thank you for purchasing the supplies from us. The foam wreath form used for this project is approximately 10 inches in diameter. That size works perfectly to create a nice, full look without being too large.
What size floral wreath did you use?
Thank you
This project is right up my alley and thanks for sharing the instructions with us. You have expanded from just giving us great containers for the treats to go with the Halloween decorations. Thanks so much.
Where can I get all of the materials?
Hi, Elizabeth!
We’re delighted that you’re interested in creating the DIY Halloween Wreath! You can find the ribbons, tulle, and scissors on the Paper Mart website. For your convenience, the blog includes direct links to the specific products used in the tutorial. Hope this helps!