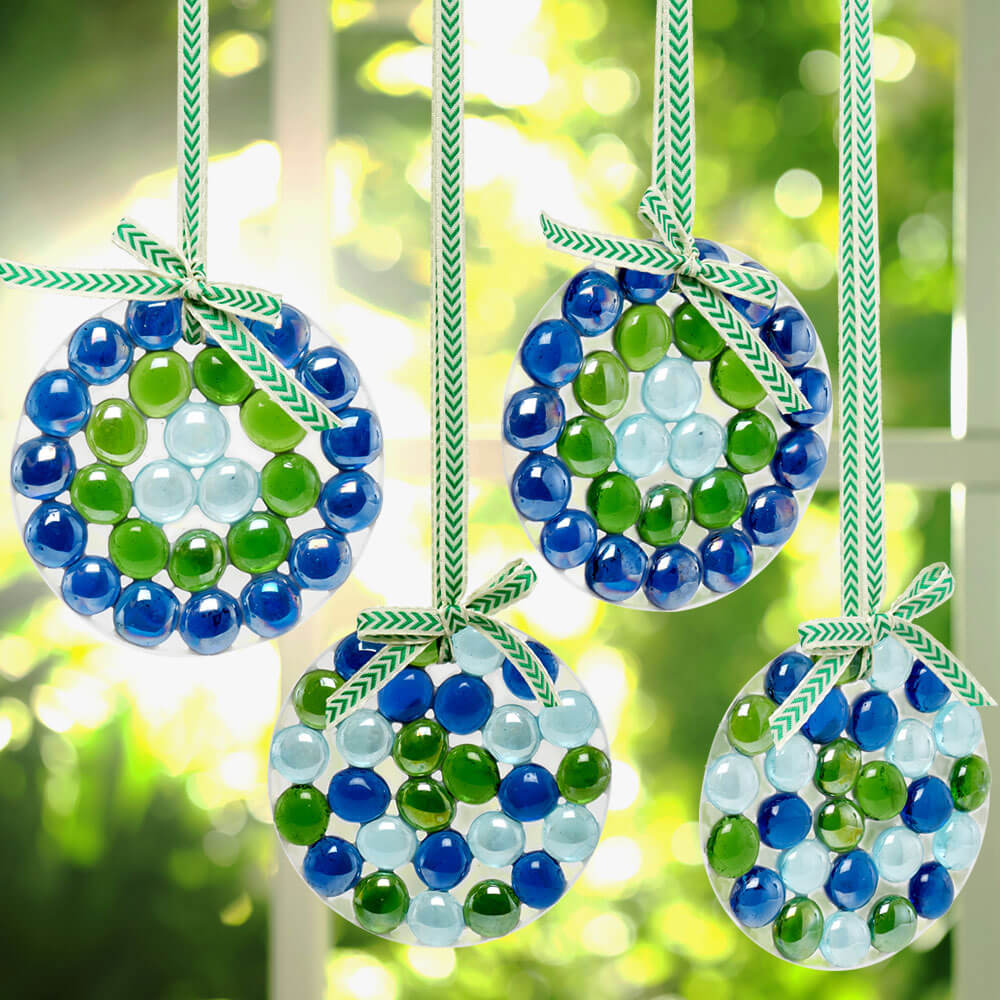
If you’re looking for an easy way to teach your little ones about light optics, consider this simple DIY suncatcher. All you need is a little glue, some marbles, and a few rays of sunshine.

Learn about how suncatchers work and how to make your own here.
Catching The Sunlight With Science
Light energy has the ability to bend, bounce, or be absorbed. As the sunlight passes through the surface of your suncatcher, it will bend ever so slightly, get absorbed a little by the colorful marbles, and display wonderful colors.
Crafts are a great interactive way to inspire curiosity within your little ones. Here’s how to get started.
Creating Your Own Suncatcher
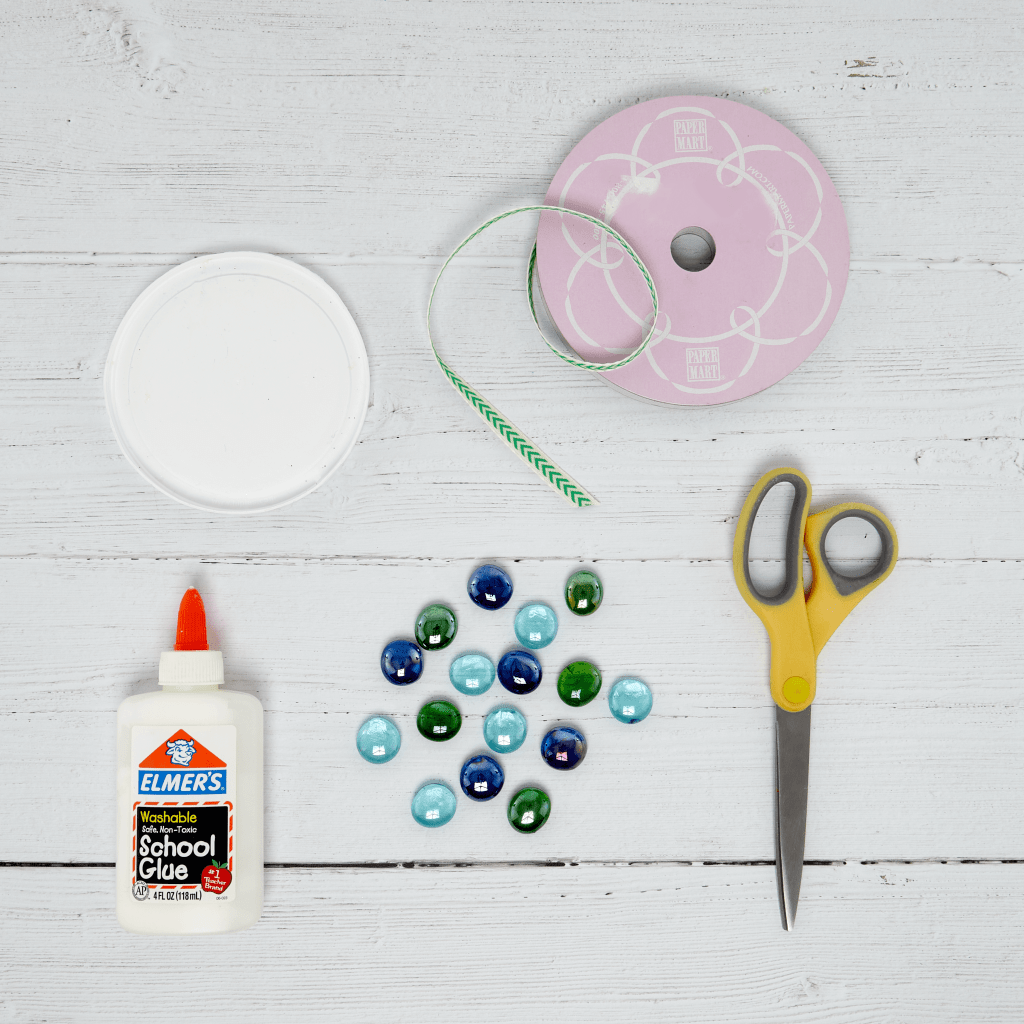
Your DIY Suncatcher Shopping List:
- Flexible Plastic Lid
- Marbles
- Your Favorite Glue
How To Make Your Own Suncatcher
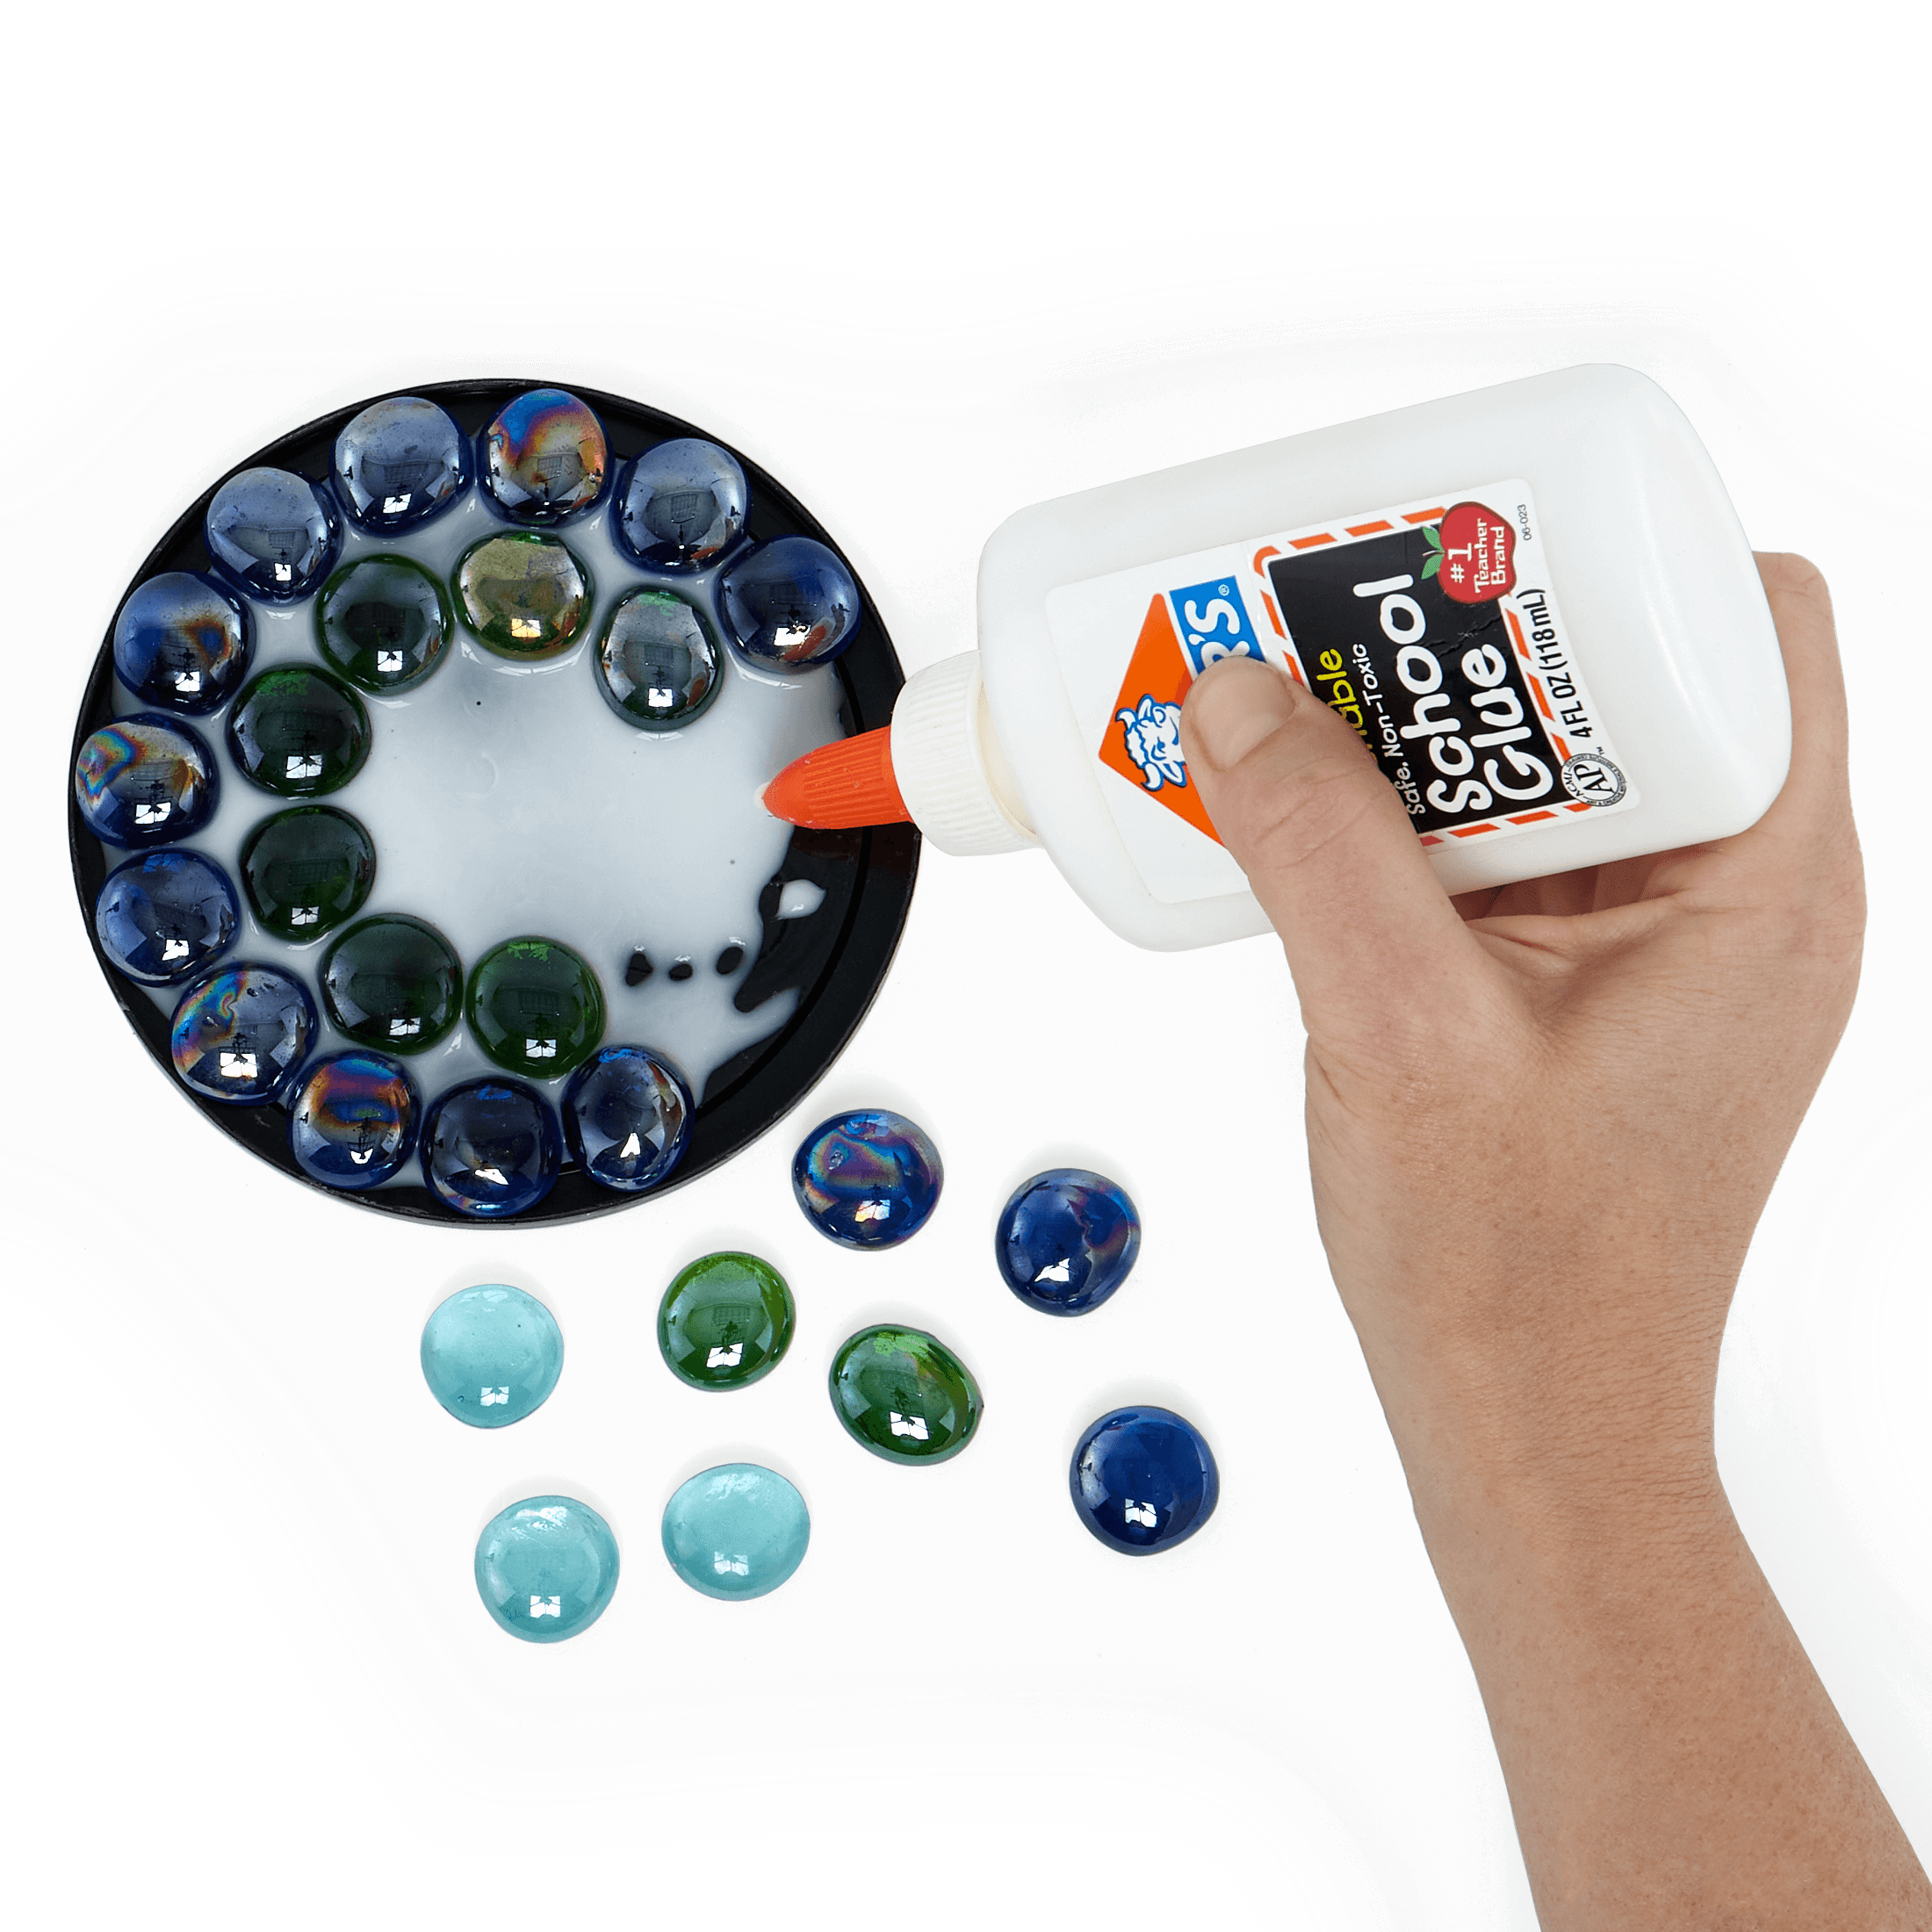
- Place your lid on a flat surface so the interior is facing upwards.
- Pour the glue into the center of your lid so it spreads evenly. Fill it with enough glue to cover the bottom of your lid.
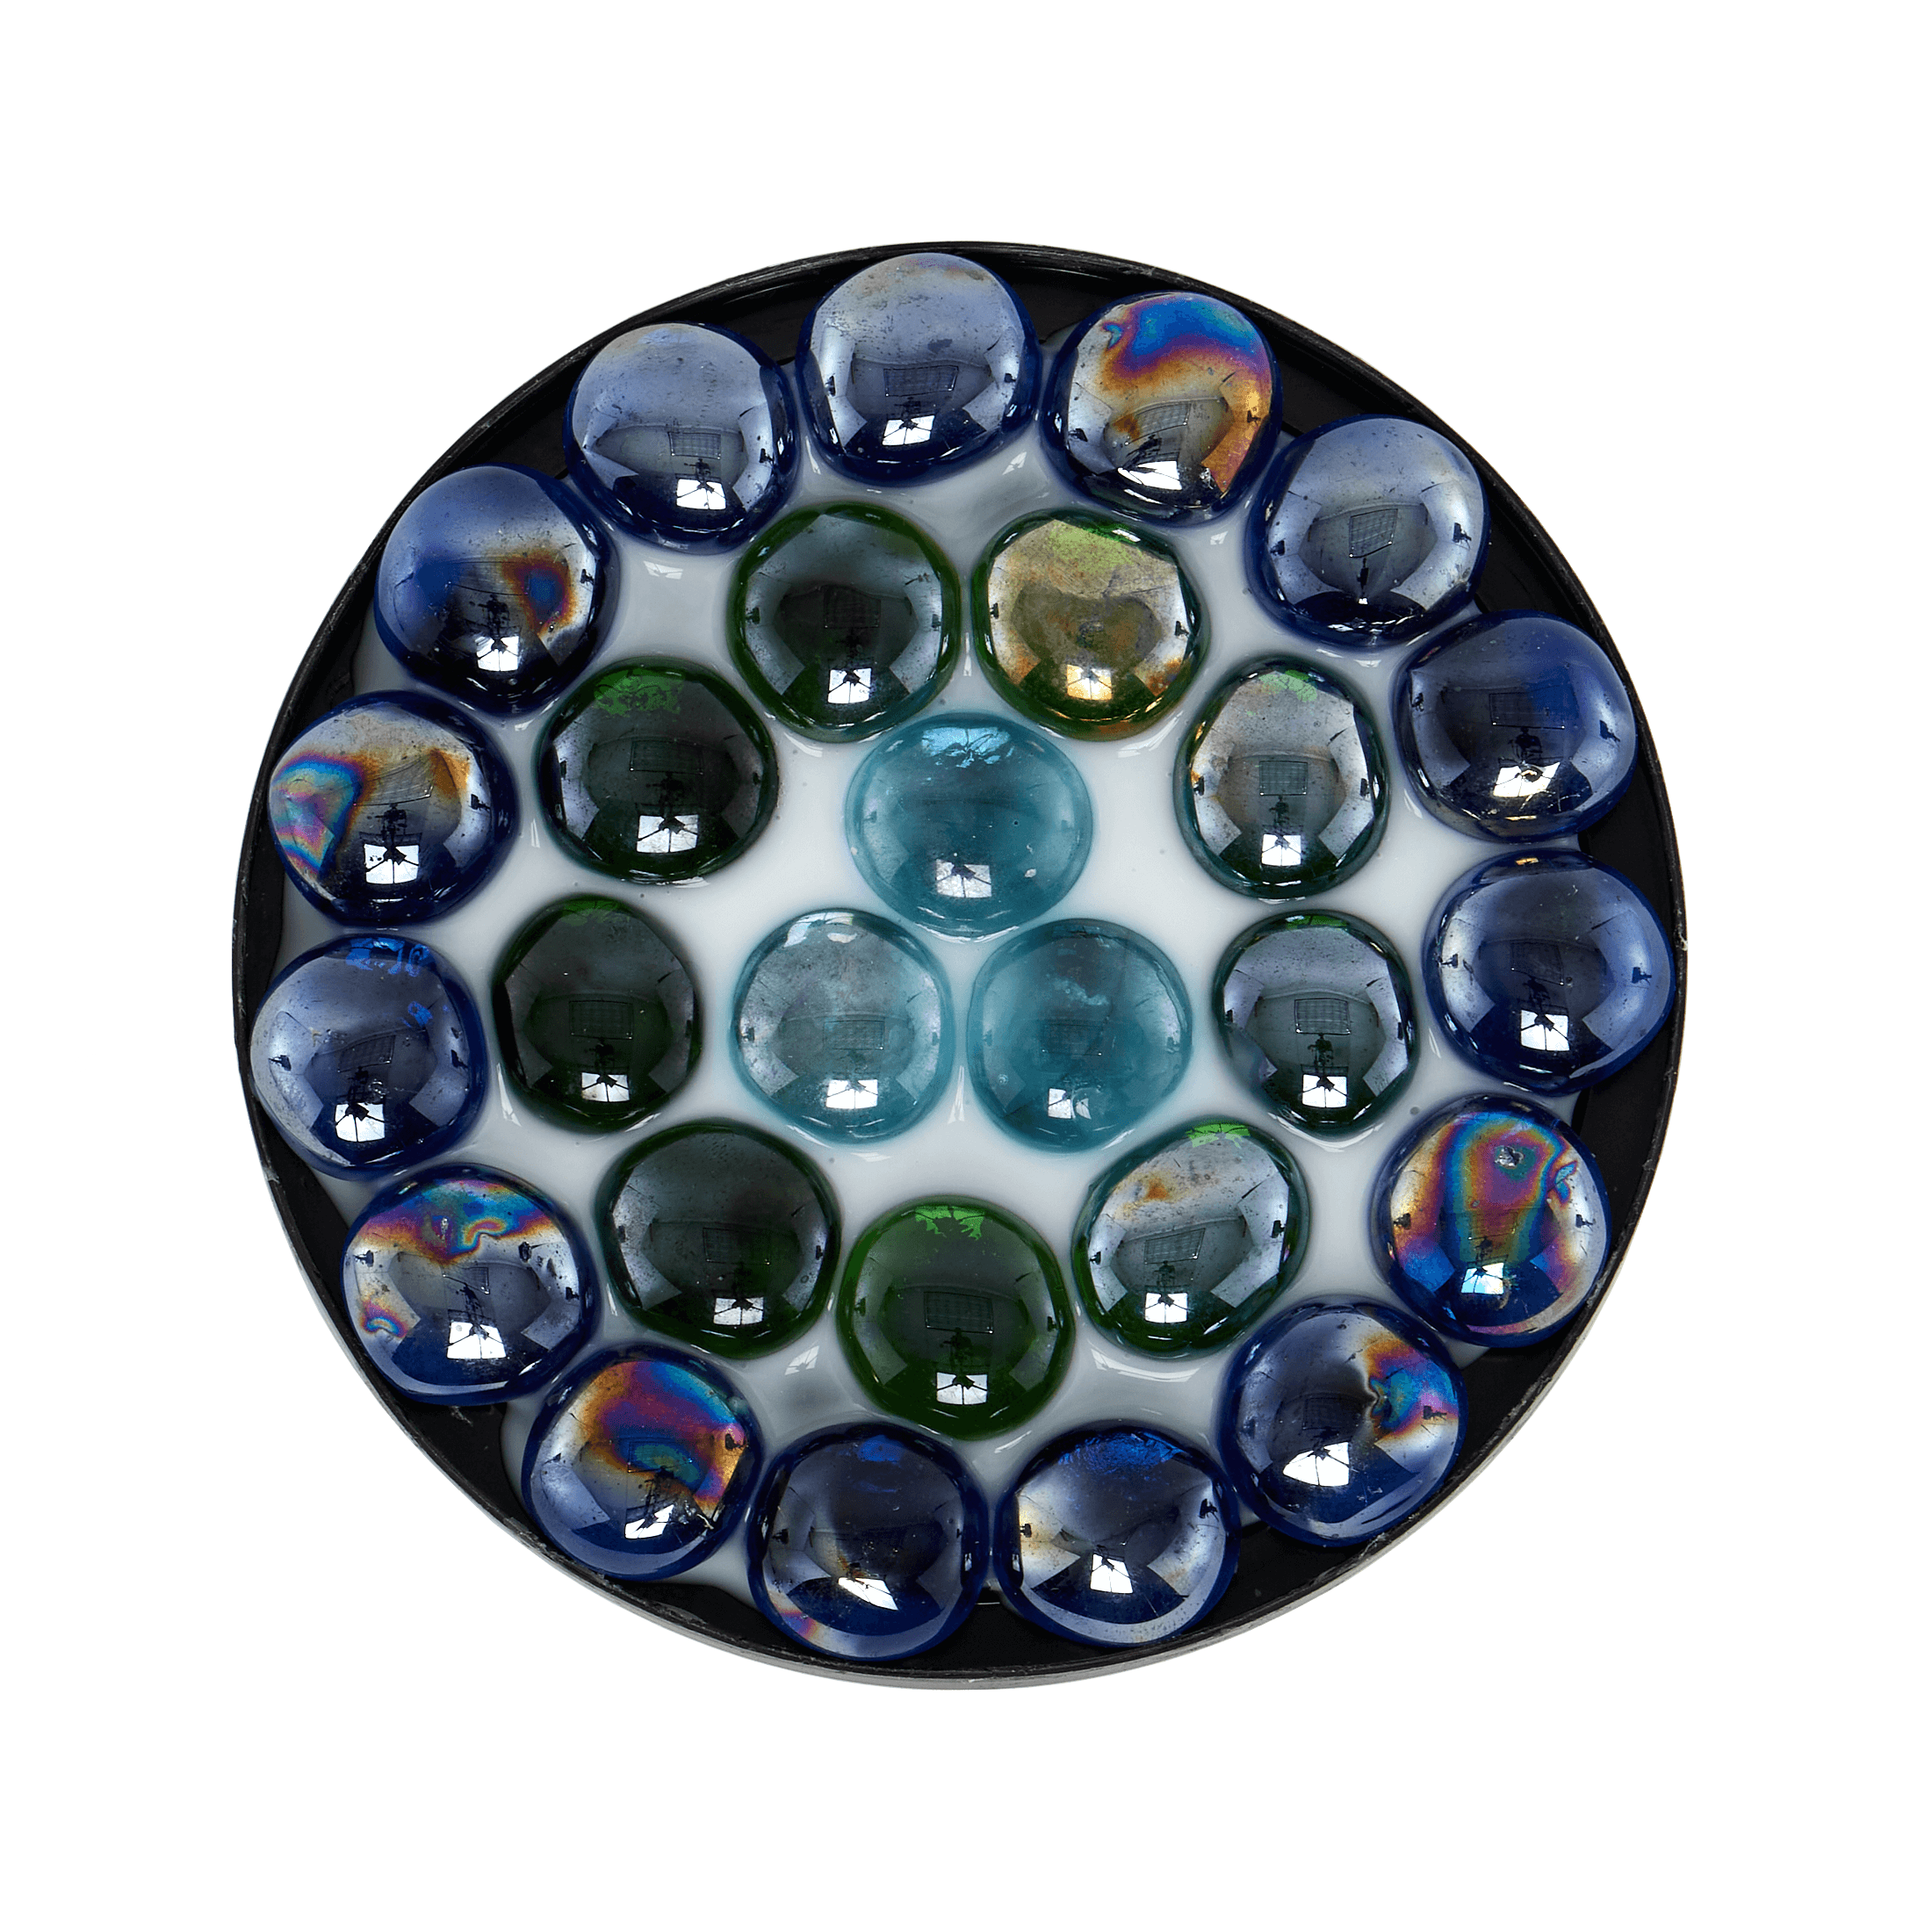
- Place your marbles onto your lid. Set aside to let the glue surface completely dry. Depending on your glue, this could take up to 3 days.
Note: This is a great opportunity to create patterns or designs! With our suncatchers, we created several marble mosaic designs. - After your glue has dried, it should be completely solid and hard to touch with a matte finish. Gently ease it out of the lid by folding the lid edges outward and peeling the glue body of your suncatcher out.
- There might be rough edges along the side from the lid as it dried. Use the edge of a razor or your scissors to carefully trim any rough spots or glue spots.
- Carve out a small hole towards the top of your suncatcher and weave a loose end of your ribbon through it. Secure with a simple bow, display where the sun’s rays can hit it, and enjoy!
We used this craft project with the elderly. They loved it! You may want to try different varieties of glue as some stretch in the heat.
thank you I do like this going to making 24 using on the dead glass on the side of my front door thank you
Awesome idea Charlotte! We can’t wait to see how you make this craft your own!