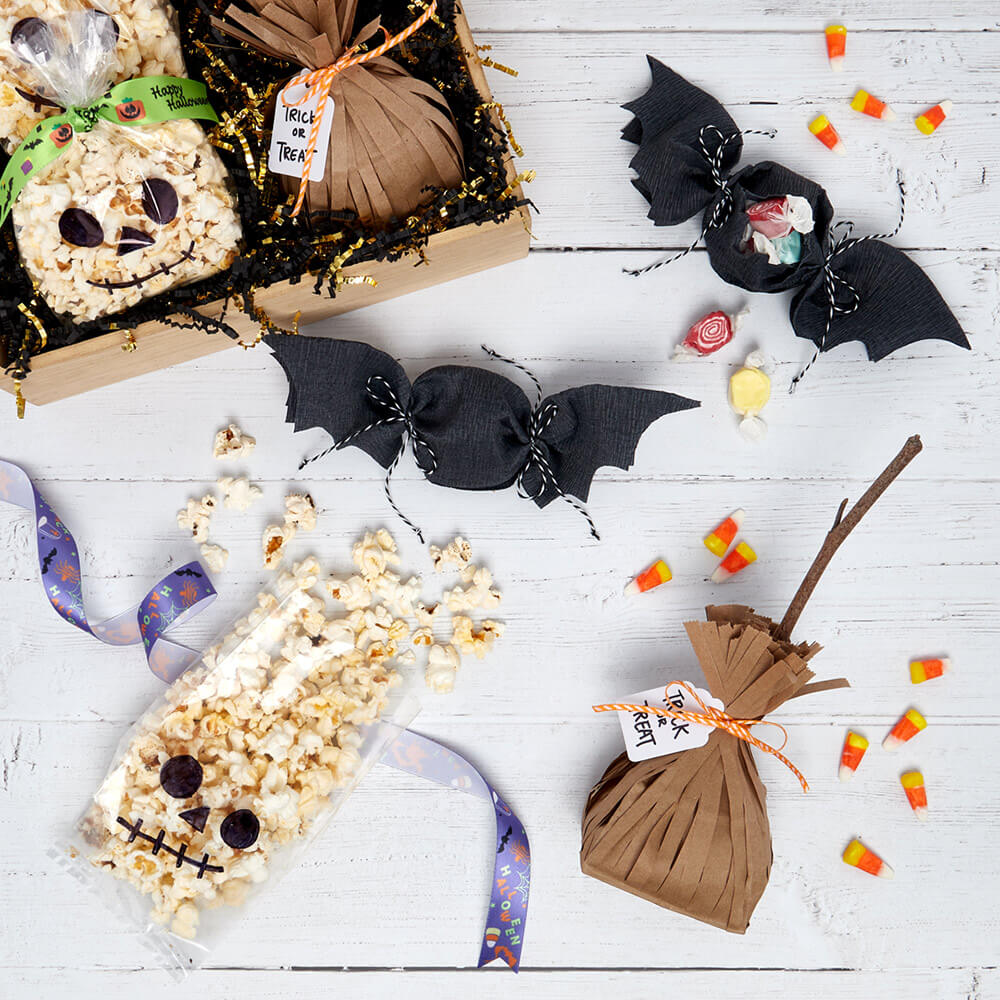
Looking for cute ideas for Halloween treat bags? Be the ghostess with the mostess and surprise trick-or-treaters with these adorable treat bags. Learn how to make them here!
FYI: If you love these ideas, check out our full DIY Halloween Treat Bags & Favors Shopping List at PaperMart.com!
Boo-tiful Bat Bag
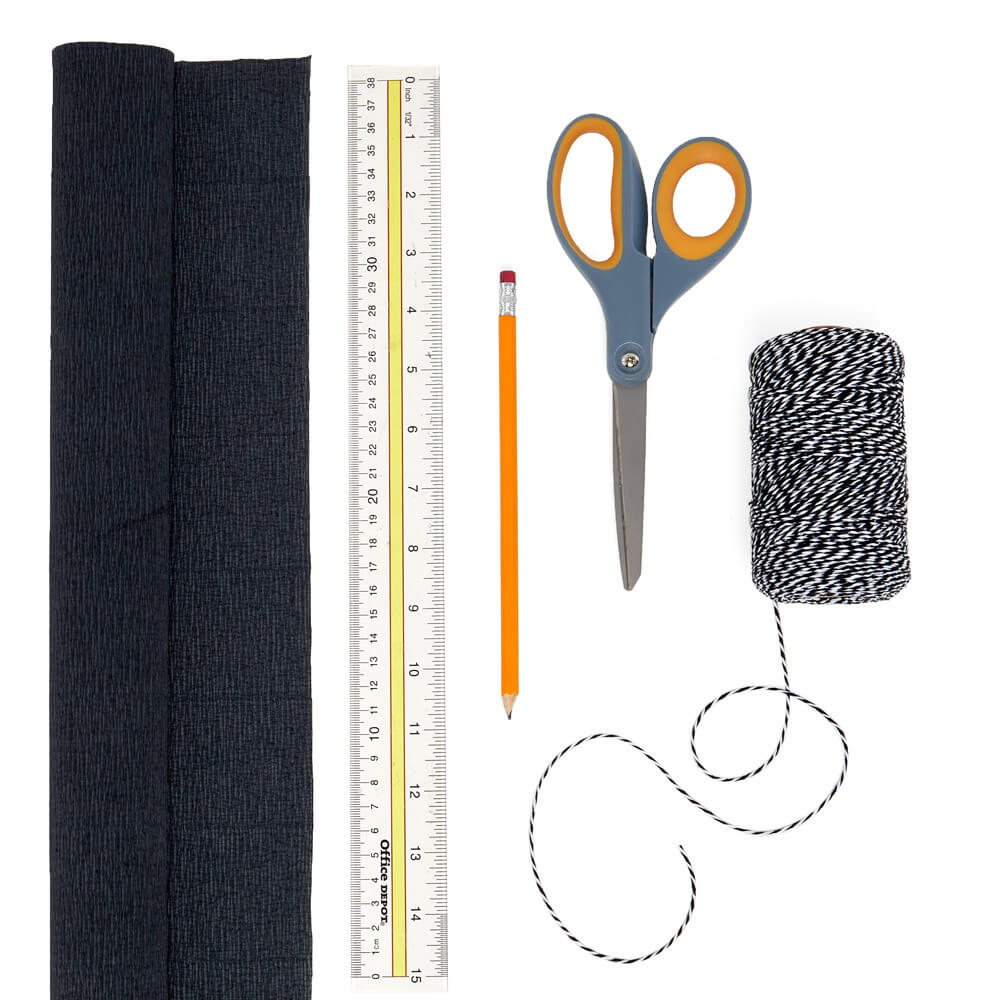
For a creative spin on the typical goodie bag, we’ve created a tiny little bat parcel with just crepe paper, a little twine, and our favorite hard candies. Here, we’ll show you how to make one of these bat-shaped treat bags.
You’ll Need
- Black Crepe Paper
- Bakers Twine
- Scissors
- Pencil
- Ruler
- Your Favorite Hard Candies
Here’s How To Make It
- First, prep your materials. Cut your crepe paper into a 11” x 9-1/2” square. Trim two 16” pieces of twine.
- Next, lay your crepe paper flat and fold it into thirds, gently pressing down on the creases to ensure they’re flat.
- After your crepe paper has been folded, use your ruler and pencil to mark 4” from each end. Take one piece of twine and wrap it around your 4” mark. Finish with a bow and tighten to secure.
- With your open end, insert your candies into the bag body. Take your second piece of twine, wrap it around the 4” mark and finish with a tight bow.
- Next, create your bat wings. Take the end of your bag and lay it flat. Using your pencil, outline semi-circles along the edge to form a wing shape. Take your scissors and cut along the outline. Repeat with the other end.
Wicked Broom Bag
Bubble, bubble, toil, and trouble – our witches broom is filled with tasty treats! With a couple of plain grocery bags and a little creativity, we’ll show you how to make a single witches broom for a tasty DIY treat bag.
You’ll Need
- 2 Kraft Grocery Bags (We used 3-1/2” x 2“ x 6-1/2 ” bags!)
- Narrow Ribbon (We used our Orange Narrow Striped Ribbon!)
- Unstrung Merchandise Tag
- Twig / Popsicle Stick
- Scissors
- Marker
- Your Favorite Hard Candies

Here’s How To Make It
- Make sure your materials are prepped. Use your black marker to write a spooky message on your tag. Trim one 20” length of your narrow ribbon.
- Next, prep the inner lining of your Halloween treat bag. Take one grocery bag and lay it flat. Starting from the bag opening, cut thin 2-1/2” long strips toward the bag center. Fill with your hard candy, position your stick upright and in the center. Set aside.
- Prep the outer layer of your treat bag with scissors, your second grocery bag, and a clever folding technique. First unfold your bag bottom by pushing the bag base out. This will help ensure your bag bottom stays flat. After your bag bottom has been unfolded, use your scissors to cut thin strips along the sides of your bag, stopping at the base. Lay your newly cut outer layer open, fringe spread away from the bag base.
- After the layers of your bag have been prepped, nestle your filled inner lining into the base of your bag’s outer layer. Fold the loose fringe of your outer layer upward, and toward the center, creating the look of layered broom bristles. To help keep the loose ends in place, apply a gentle pressure to the loose ends and twist slightly.
- Once your bristles have been gathered, wrap your ribbon around the broom, weave one end through your personalized tag, and finish with a tight bow.
Skele-fun Popcorn Bag
Say, “Bone Appétit!” with these expressive Halloween treat bags. All you need is a marker, clear cello bag, and your favorite popcorn. Let us show you how to make your own!
You’ll Need
- Gusseted Cello Bag (We used a 4” x 2” x 8” cello bag!)
- Your Favorite Halloween Ribbons
- Scissors
- Marker
- Your Favorite Popcorn Snack

Here’s How To Make It
- First, make sure your materials are ready! Trim two pieces of 11” long ribbons.
- Next, give your bag a spooky personality. Lay your bag flat and use your marker to draw eyes, nose, and a mouth onto the bag surface. After your skeleton face has been drawn, let the ink dry onto your bag according to your marker’s directions.
- Fill your bag 3/4 full with your favorite popcorn snack.
- Once filled, cinch the bag top, wrap one of your ribbons around the cinched area and tie to secure. Repeat with your second ribbon.
I would like to thanks for creating a great piece of content. This is very comprehensive article on creating Halloween treat bags, written in a simple way.
This is wonderful. Thanks for the great ideas.