
Whether you’re customizing a gift, toting towels to the beach, or hauling groceries home, fabric bags are a convenient — and attractive — accessory!
Whether you need a decorative sack to gift a nice bottle of wine or a durable tote for all your beachy accessories, you can find the fabric bag to suit your needs at Paper Mart.
But, if you’re feeling particularly crafty, you can take the DIY route and sew your own bags with a few key materials. Below, you’ll find four different ways to make fabric bags for any occasion.
 Drawstring Bags
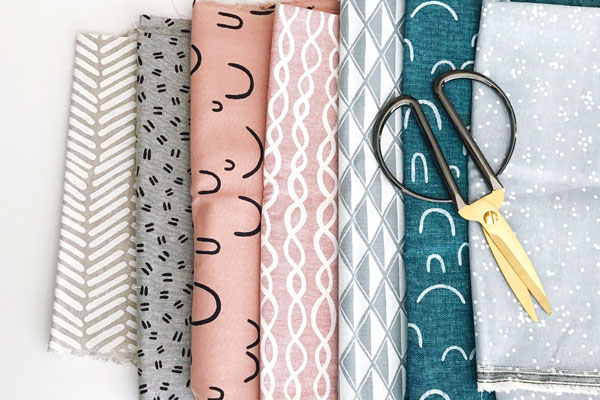
Fabric drawstring bags are perfect for carrying around, well, just about anything. Roomy, easy to close and inexpensive to make, you can customize your bag with your favorite fabric like muslin, burlap, or jute.
Materials: 6.5 x 21-inch piece of fabric; 22 inches of ribbon or cording; sewing machine and thread; iron
1) Turn the ends of your fabric under by a quarter of an inch and stitch in place for smooth edges.
2) Turn the fabric right side up and stitch the sides together with a ½ inch seam, leaving a few inches open at the top.
3) Iron the side seams open and secure them with a straight stitch.
4) Create the drawstring opening by folding the top edge of your bag down by an inch and sewing all the way around. Make sure that you leave openings on either side of the bag.
5) Feed one piece of your cord through the opening at the top of the bag, then feed it back through the other opening so that both ends of the cording are on the same side.
6) Repeat with a second cord, feeding it in from the opposite side.
7) Tie the ends of the string on each side together.
8) Fill up your bag, and pull the strings tight!
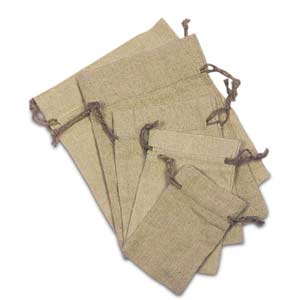
 Wine Bags
Fabric wine bags make a decorative treat for any hostess gift. You can make a drawstring version by following the instructions above, or by using the method below:
Materials: two 12 x 16-inch pieces of fabric in coordinating colors or patterns; 12-15 inches of lace, trim, ribbon, jute or twine; sewing machine and thread
1) Lay your fabric lengthwise — right sides together — so that each piece measures 6 x 16 inches. Sew the sides and bottom edges using a ½-inch seam allowance, creating an L-shape.
2) Pinch one of the corners you just made, and fold it over the seam at the bottom of the bag. Measure 1.5 inches from the tip of the corner and sew horizontally across the corner. Repeat on the second corner.
3) Trim off both corners, being careful not to cut through the seam.
4) Flip your wine bag’s outer layer of fabric right side out. The inner lining fabric should remain wrong side out.
5) Place the inner lining fabric bag inside the outer fabric bag. Then fold each raw edge inward by half an inch and stitch together.
6) Using a ¼-inch seam allowance, top stitch the raw edges together. Now just pop in your wine bottle and tie it off with your favorite trimming!
 Gift Bags
Small fabric drawstring bags are a great way to jazz up your gift-giving. For weddings and shower gift bags, satin and organza fabrics provide a luxurious feel. Here’s an easy – almost no-sew — way to make fabric gift bags of any size:
Materials: fabric; ribbon, or trim; sewing machine or needle and thread; pinking shears
1) Cut your fabric into a rectangle that is twice the width you need.
2) Fold it in half with the right sides together.
3) Stitch down the sides and along the bottom with a ¼-inch seam allowance, then turn the fabric right side out.
4) Trim the top with pinking shears for a decorative edge.
5) Fill your bag and tie it off with your favorite ribbon!
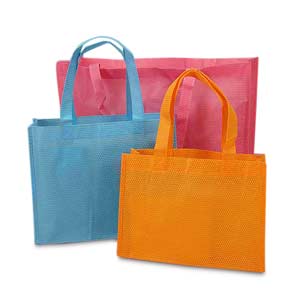 Tote Bags
Customize your fabric tote bags with your favorite color fabrics, and you’ll be the most stylish gal on the block. Here’s how to make a fashionable tote bag in a few simple steps:
Materials: two 18 x 14-inch pieces of canvas or cotton fabric; two 18 x 14 pieces of interfacing; two 21-inch strips of canvas; sewing machine and thread; scissors; iron
1) To form the base of the fabric tote bag, trim a 2 x 2 inch square from the bottom corners along the long side of all rectangles as well as the interfacing.
2) Iron the interfacing to the wrong side of the outer fabric rectangle. With the right sides together, sew ½-inch seams along the sides and bottom of the piece. Leave the top corners and the two snipped corners unsewn.
3) Pinch together the snipped corners so that the side and bottom seams are lined up in the center, and stitch with a ½-inch seam allowance to create a flat bottom.
4) Repeat with the inner liner fabric.
5) Flip the inner liner right side out and place inside the outer fabric so that the right sides are together. Place the canvas straps between the inner and outer fabrics.
6) With a ½-inch seam allowance, stitch around the top of the tote, sewing the canvas straps into the fabric. Be sure to leave a gap of approximately 4 inches.
7) Turn the fabric tote bag right side out through the 4-inch gap.
8) Give your bag a final top stitch, and you’re finished!
Pick up some fabric and trim and get started making your own fabric bags today!
These are FANTASTIC! and very creative i really love your idea the process is simple and easy i will definitely try this but it would be very helpful if you share the idea of how to create anti theft lunch bags in a simple way.
thanks for sharing the amazing ideas with us 🙂
Pretty ones ! I love drawstring bags as it is so easy to handle. These are colorful and classy. Really loved it !