A beautifully designed package sets the tone for you and your business. Create an experience for your customer by designing jewelry packaging unique to your brand message and personality.
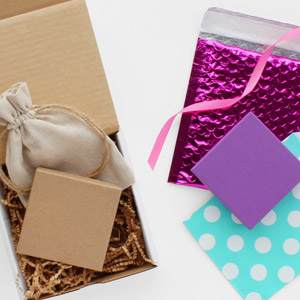
Here are two ways you can incorporate your personality into your packaging, natural and charming, or colorful and bold.
Natural Packaging
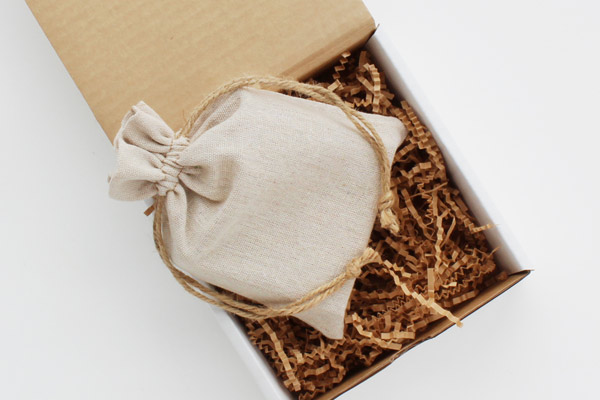
For a bespoke, made-for-you look, consider packaging with natural materials like unbleached kraft, coordinating crinkle paper, and linen. These elements provide a naturally beautiful accent that let your jewelry creations shine.
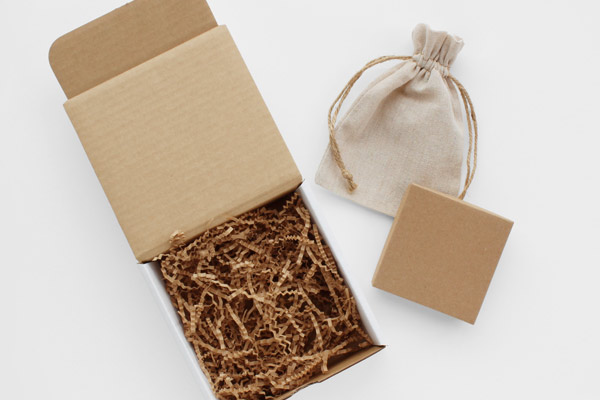
Here’s What You’ll Need To Create This Look
How To Create Rustic Packaging:
Using your natural kraft jewelry box, place your jewelry onto the center of the soft cushion and close the lid.
1.) Place your jewelry box into your linen bag and tighten the drawstrings to secure.
2.) Take your tuck top mailer and fill it with crinkle cut paper. Make sure any empty spaces are completely filled.
3.) Once filled, place your linen bag into the center of your box.
4.) Finally, flip your mailer box lid over and securely close it.
Colorful Packaging

For a bright and colorful touch to your jewelry packaging, consider bold colors and patterns. Pair trendy dots with vivacious pastel colors and iridescent finishes. Bright and colorful package design provides a modern and expressive accent to your jewelry.
Here’s What You’ll Need To Create This Look
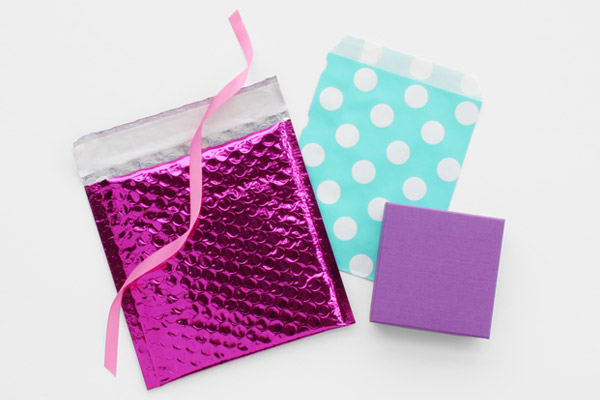
- Solid Colored Jewelry Box
- Premium Satin Ribbon
- Large Dots Merchandise Bag
- Hot Pink Metallic Bubble Mailer
How To Create Colorful Packaging:
1.) Using your colorful box, place your jewelry onto the center of the soft cushion and close the lid.
2.) Place your jewelry box into your merchandise bag. Fold the top of your merchandise bag over.
3.) To embellish and seal your merchandise bag, punch two holes near the top of your merchandise bag. Thread your satin ribbon into each hole and tie the ends into a basic bow.
4.) Finally, once your merchandise bag is sealed, insert it into your metallic bubble mailer. To seal, remove the adhesive strip and fold the top over.
FYI: For more small item or party favor packaging ideas, check out our pillow box design ideas here!
With just a few steps and supplies, your products can be packaged easily and beautifully. Liked this shipping technique? Keep following our blog all year long for more DIY craft videos, tips for small businesses, product features and more!
What would the price be for the natural packaging set! It looks great?
Hi Kathy! We’re so glad you love it! For price, ordering details, and a few more eco-friendly options, check out our Eco Friendly Packaging selection at PaperMart.com. If you have any further questions, please feel free to reach us directly at (800) 745-8800.
Hi, what are your measurements for the Natural packaging for jewelry? Thanks!
Hi Michelle! For this video we used a 3-1/2″ X 3-1/2″ X 1″ Natural Kraft Jewelry Box, a 6″ X 6″ X 2″ White Tuck Top Box, and a 5″ X 7″ Linen Bag. Hope this helps! Don’t forget to share your beautiful packaging with us using the #mypapermart tag!