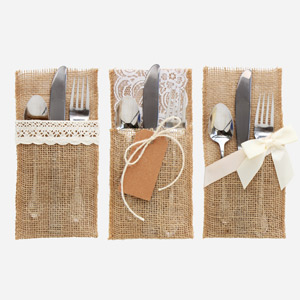
Accent your rustic summer wedding with simple no-sew silverware holders.
There is no better way to personalize your rustic summer wedding reception than with charming DIY details. However, if you’re not accustomed to crafting your way through large scale events and parties, the thought of handmade accessories can be stressful.
This is why we created this (no sewing required) easy to craft DIY. These silverware holders add a personalized touch to your wedding while allowing you to keep your cool.
Learn how to pair the natural, rough texture of burlap fabric with touches of romantic lace, chic satin, and personalized name tags for the perfect handmade summer party accent.
Silverware Holders With Romantic Crochet Lace
For a rustic and dreamy silverware holder, simply combine a beautiful lace detail with burlap. Paired together, these elements provide a soft, romantic touch to any tablescape.

Here’s What You’ll Need To Create This Look:
How To Create Burlap Silverware Holders With Crochet Lace:
- First, fold the bottom of your burlap fabric to create a pocket for your silverware.
- Next, cut lace trim approximately 4”. Align with burlap fabric edge, glue to secure.
- Then, fold edges of lace trim and burlap fabric inward, along fabric fold. Glue to secure.
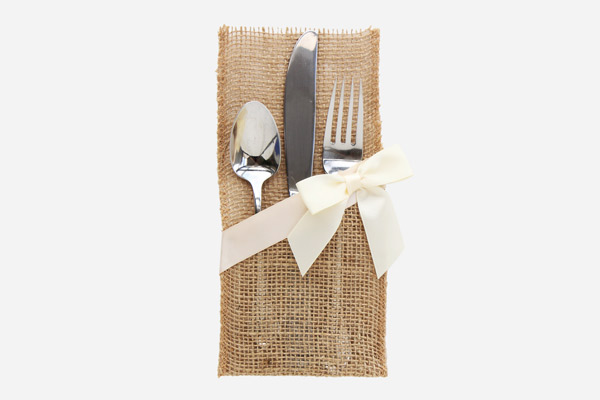
Silverware Holders With Chic Satin Accents
For a more formal outdoor wedding, store your silverware in a holder with soft and smooth satin accents. These chic satin touches elevate a humble strip of burlap simply and naturally.
Here’s What You’ll Need To Create This Look
How To Create Burlap Silverware Holders With Satin Accents:
- First, fold the bottom of your burlap fabric to create a pocket for your silverware.
- Create your angled detail by cutting one end of your burlap fabric at a 45° angle.
- Next, cut your satin ribbon approximately 4” and align with angled burlap edge. Secure satin ribbon to edge with hot glue.
- Then, fold both your satin ribbon edges and burlap fabric inward, along your fold line. Glue to secure.
- Finally, the finishing touch – embellish with pre-tied satin bow.
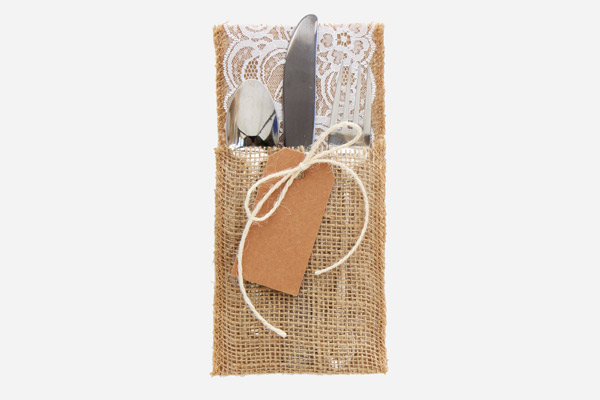
Silverware Holders With Personalized Lace And Name Tags
For a customized silverware holder, provide your guests the option to personalize their silverware holders with Kraft gift tags. These simple details provide a bespoke accent to your summer wedding table settings.
Here’s What You’ll Need To Create This Look
How To Create Burlap Silverware Holders With Lace And Name Tags:
Tip: Burlap fabric is known to be loosely woven, however you may need a little extra help weaving your twine through your material. Use the tips of your scissors to gently create a hole through your burlap fabric.
- First, fold the bottom of your burlap fabric to create silverware pocket.
- Next, cut your wide lace ribbon to your preferred size and glue to burlap fabric.
- Fold excess burlap fabric lace edge to form silverware holder pocket, then glue to secure.
- Attach gift tag using twine and finally – finish with a bow.
FYI: These silverware holders pair wonderfully with a rustic table setting. Design your own with natural elements like glass mason jars, metal pails, and paper party decor!
With just a few dots of hot glue and a little creativity, your handcrafted summer wedding will be a charmer. Looking to create this DIY? Show us #MyPaperMart! We are inspired by you and your creations and love seeing them. Loved this DIY? We’ll be making more all year long, so stay tuned for more DIY craft videos, tips for small businesses, and product features!
How do you prevent the top and bottom edges of your pocket from fraying? Would love to make these for my daughters wedding.
Hi Lwaddy! These would be beautiful wedding DIYs. I love this idea. To help prevent against the natural fraying from burlap, we recommend applying a thin layer of your favorite craft adhesive to your edges to stop any edge fraying.
Love these so much I can’t pick one. Thanks for sharing!