If you want a successful small business, especially an e-commerce business, you need visuals that represent you, your brand, and your product in the best light possible.
When shopping online, you lose the brick and mortar advantage of your customer being able to touch and feel your product and brand. This is why it’s crucial for your visuals to be perfect.
Luckily, with a strategic home photography setup and a little bit of lighting know-how, the perfect professional photo can be achieved. Let us show you how.
Here’s How To Achieve The Perfect Photo
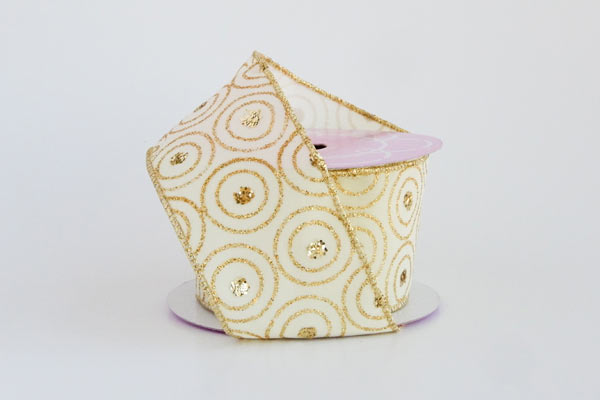
To illustrate these examples, we’re going to use our Circles Flocked Ribbon, some white glossy paper, and our window.
The Set Up
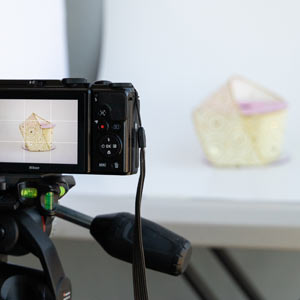
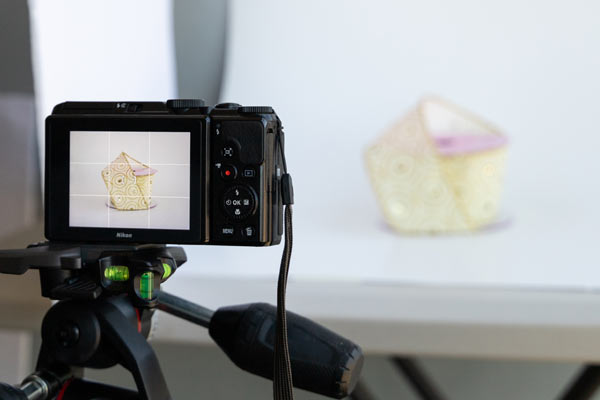
When setting up your home photo studio, consider the mood and overall look you’re attempting to create. At Paper Mart, we like to stick to a clean cut, professional look.
To achieve this, we take care to ensure our backgrounds and settings are seamless, smooth, and clean. We want to showcase our product in the best way possible so we incorporate a white background and position our subject simply.
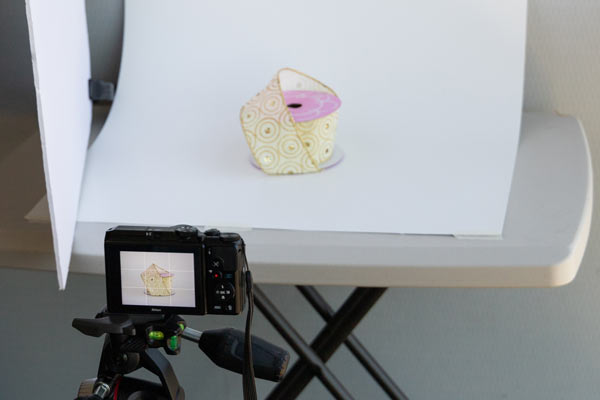
If you’re shopping around for white backgrounds, you’ll find a couple of options – white muslin drop cloth or a white glossy paper. While you’re able to use both and achieve fine product photos, we prefer using a white glossy background for its natural tendency to reflect light around our products and discourage harsh shadows. Here, we’re focusing on a Circles Flocked Ribbon against a white glossy paper background, with no harsh shadows. To achieve that seamless look, we positioned our glossy paper by taping it to the wall and allowing it to sweep under our ribbon. This allows every facet of the ribbon to be showcased in the best possible way.
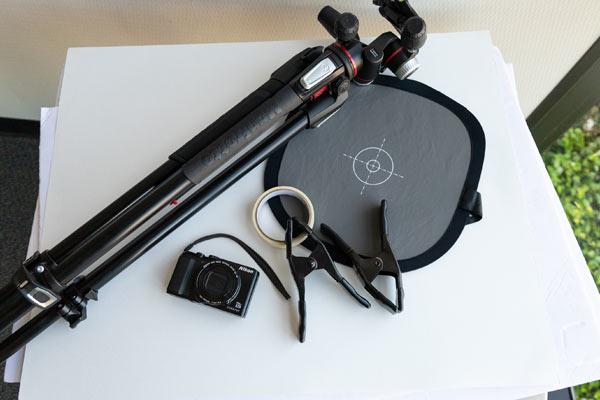
Our Favorite Photo Equipment
Besides our camera, here are a few crucial pieces of photo equipment that we like to use with soft, natural window light.
- Gray Card | A gray card is a color balancing tool that ensures our photo is accurately exposed and color balanced.
- Tripod | Tripods are great because they offer sturdy support for our camera.
- Tape & Clamps | These common hardware tools are our best friends. We use both of these items to help create temporary backgrounds and hold photo equipment securely.

Lighting
As you’re setting up, think about your subject, the time you have available to photograph, and your lighting.
Within a home setting it may seem difficult to pinpoint the exact time and lighting necessary to capture the best photo, but with a little know-how and clever positioning, the perfect photo is easy to achieve.
What you’ll need to get clear, sharp details and no harsh shadows on your product is a single, continuous light source on your product and your white glossy studio set up. A continuous light refers to a light source that stays lit, as opposed to a high-intensity, quick flash. This allows you to see what the product will look like before we take the photo and if need be, adjust our product’s positioning or lighting so that it’s perfect.
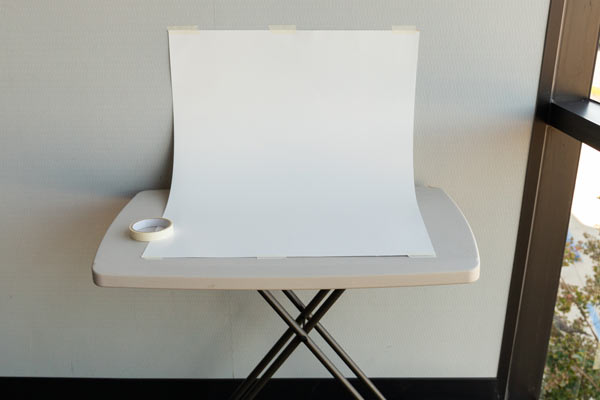
Here, we’re taking advantage of natural morning light and positioning our set up close to a large window. As the light shines into our set up, it bounces off the white glossy surface and reflects a flattering white light onto the product. To recreate this setup, position your home studio next to a large window or open door.
Finally, Have Fun With It
While you have a lot to think about while setting up your home studio – background details, lighting type, and product positioning details, don’t forget to have fun with it and play around with your product until you get the photos you want.
Try adjusting its position, grouping it with different items, or styling it in unique and interesting ways. This is where you should be able to let your creativity shine!
That’s just what I was thinking! Thank you!
Great article. Makes me rethink purchasing a light box.